The Software Installation Guide simplifies the setup process. Download and using the WIZARD app, pair your cameras, and gain remote access via the web client or mobile app. This guide ensures a hassle-free experience, enabling convenient surveillance and customization options.
Table of Contents:
Startup Wizard
After NVR startup is completed, the Startup Wizard will display on the screen. Wizard setting menu includes: Homepage, HDD Management, Network Configuration, IPC, Setup, Record Schedule and General System Configuration.
- Homepage and HDD Management


- Network Configuration

- IPC Setup

- Auto Assign IP to Camera(s): Select this to reassign an IP address to the IP camera that is already connected to the NVR.
- Add All: Select this to add local ONVIF cameras (NVR and IP cameras are connected to the same router). To complete the connection, enter user name and password of the IP camera and click OK.

- User-defined Add: Select to add or remote ONVIF cameras over the internet.

Enter the Connection parameters of the IP camera: IP Address/ Domain, Port, Protocol, User Name, and Password. Then select add.
- Record Schedule

- Channel: Select the channel to set its recording parameters.
- Normal: When the time slot is marked green, this indicates the channel performs normal recording for that time slot.
- Motion: When the time slot is marked yellow, this indicates the channel records only when a motion is detected during that time slot.
- IO: When the time slot is marked red, this indicated the channel records only when alarm is triggered during that time slot.
- No Record: A time slot marked black means that there is no recording scheduled for the time slot.
- General System Configuration

- Date/ Time: Enter the date and time manually.
- Date Format: Set the date format here.
- Time Format: Set the time format here.
- Language: Choose the OSD language.
- Video Format: Choose the video format between NTSC and PAL. If the NVR's picture is flickering or has only black screen, it may be that the video format is not correct.
- Menu Timeouts: Select time out for the NVR to exit the menus when they are not in use. ln this case ask if your lSP can provide you a static IP address. If not, then you would need to configure the DDNS service. Also, please ensure the UPnP is configured in the NVR and router, or the manual port forwarding is completed in the router.
Remote Access via Web Client
Use the Web Client to remotely access your NVR at anytime via a PC. Before you access the Web Client, you need to ensure that the network settings of the NVR are configured properly The most convenient and efficient way is to set the NVR a static lP address, You will need to open the web browser on your PC and type in the static lP address you have set on the NVR. However, if the lP address of the NVR is assigned by a DHCP server. However in this case, each time you reboot the NVR, the lP address will changes. ln this case, ask if your lSP can provide you a static lP address. lf not, then you would need to configure the DDNS service. Also, please ensure the UPnP is configured in the NVR and router, or the manual port forwarding is completed in the router.
You will need to install the plug-in if this is the first time you connect your NVR via IE, Google Chrome, Firefox, or Mac Safari.
Remarks: Support internet explorer on windows or safari on mac. For firefox supports V51 or lower. For google chrome, supports V44 or lower.
Login to Web Client

Notice for Windows 8 and Windows 10 Users:
- lf you are running Windows 8 or Windows10, you will have to right click on internet explorer from the start menu and select “Run as administrator”.
- After successfully Login to the Net Viewer, the system will enter into live display interface and connect to audio/ video feed automatically.

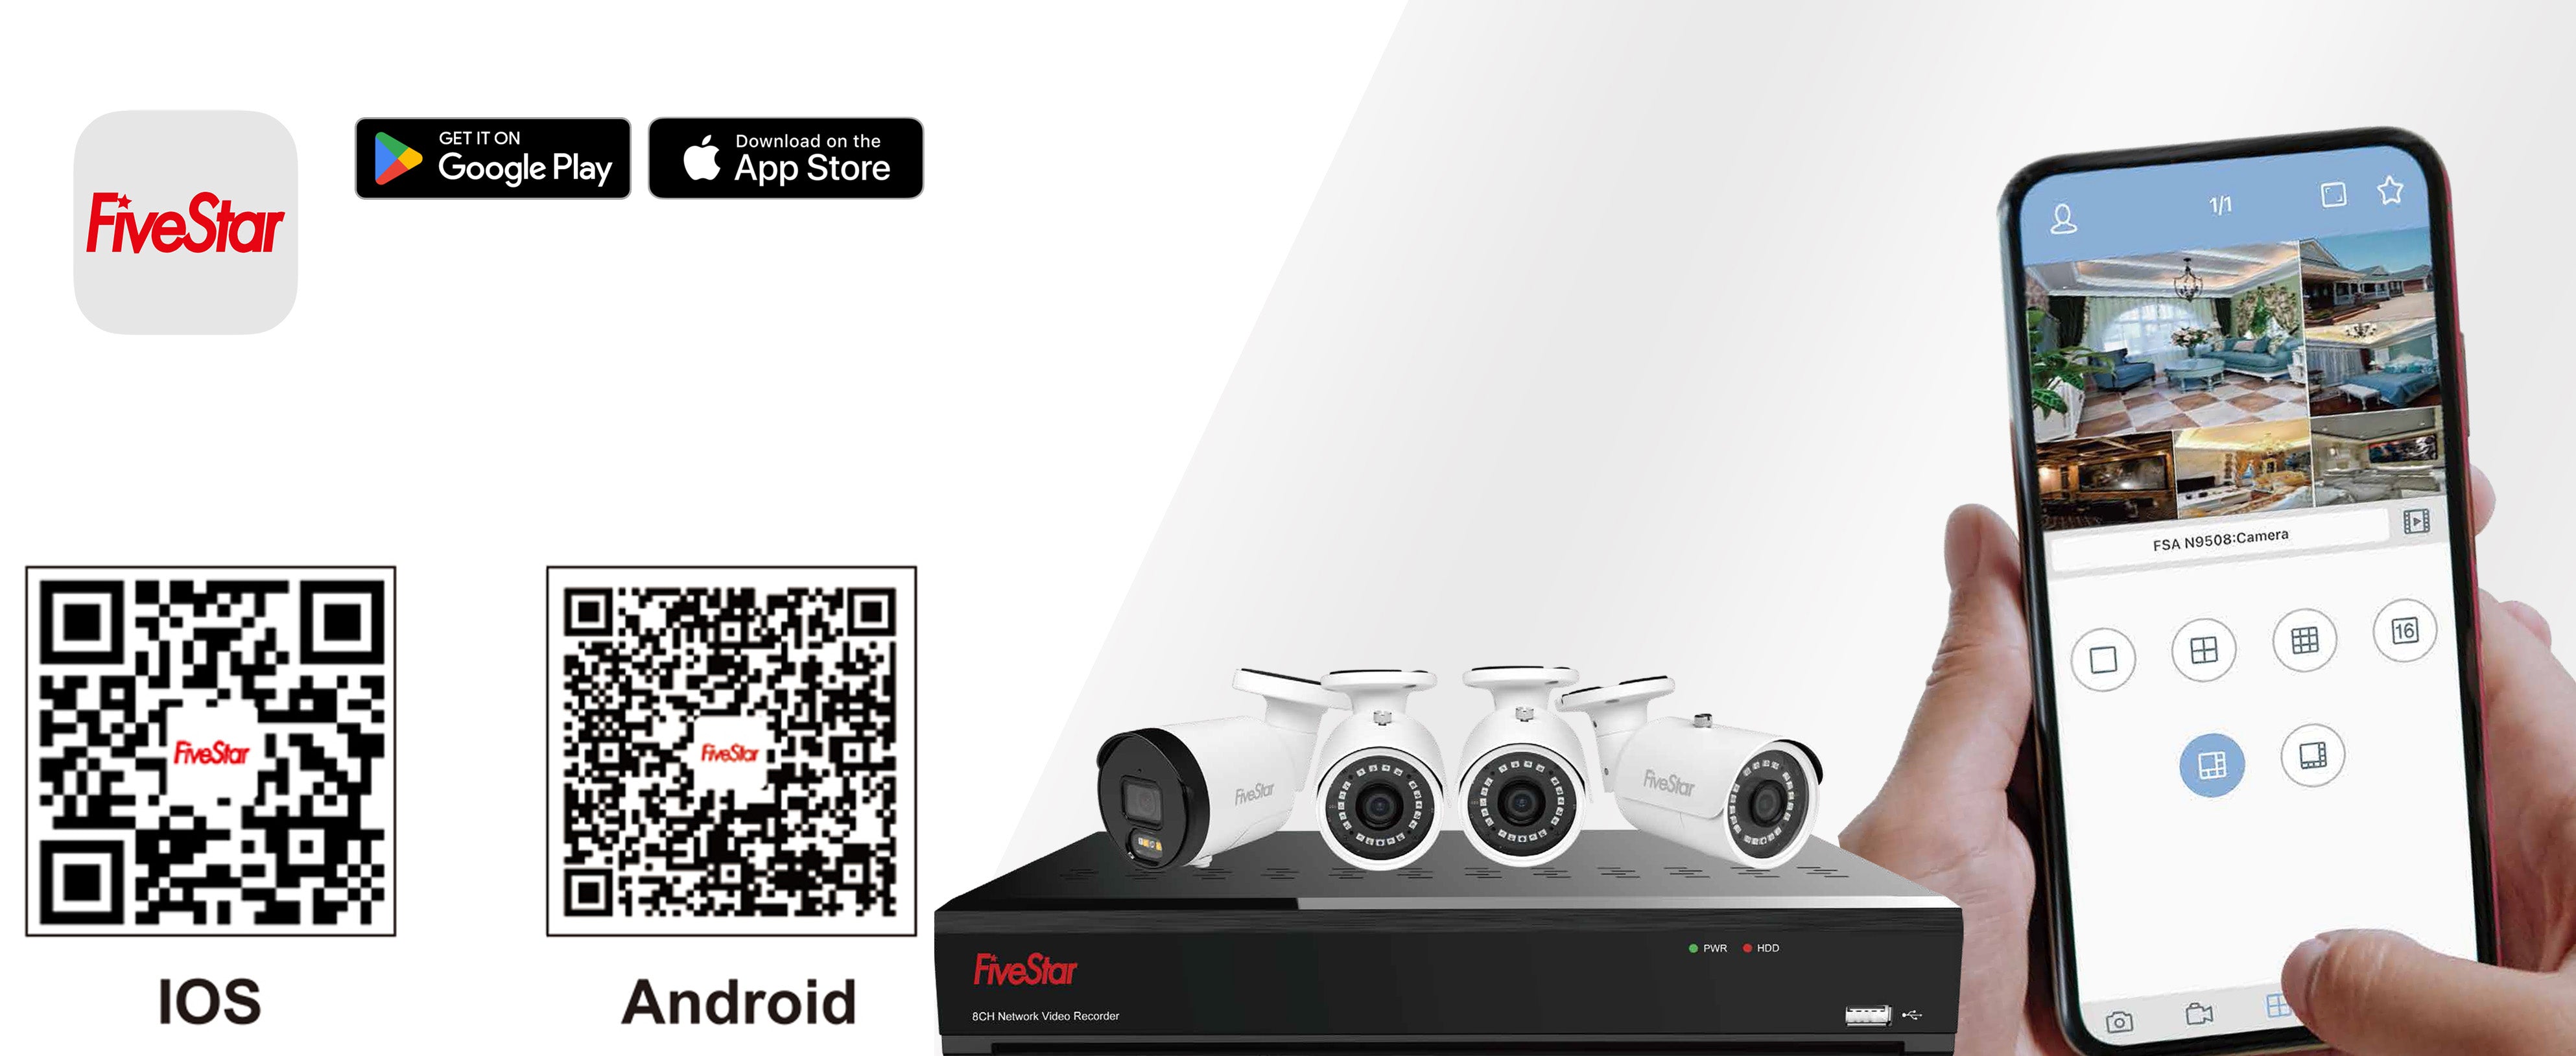
Remote View on Mobile Devices
- Open the application store (ios) or google play (Android).
- Search for and install Five Star lP application.
- .Open Five Star IP application
- Go to Device. Click '+' to add new device. Scan QR code on the top of NVR case. Then input client port, user name and password, and then click "Save" to log into the NVR.
- Live View

To get user manual and software for the bundle kit, please visit www.btgsmart.com or scan the QR code!